Composting Made Easy: How to Start Composting in a Tumbler

By Jana Taylor
Composting is a simple, effective way to reduce waste, enhance your garden, and support the environment. Learn how to master composting with a tumbler, a tool that accelerates the process and keeps things neat and pest-free. From choosing the right tumbler to troubleshooting common issues, this guide covers it all, helping you turn kitchen scraps and garden waste into nutrient-rich compost. In this blog, we’ll go over:
- The benefits of composting in a tumbler
- How to choose your tumbler
- The key ingredients and techniques to building your optimal compost
- The common problems you may run into
- More resources to keep your garden strong and healthy with compost
If you've ever wanted to reduce waste, improve your garden, and help the environment all at once, composting is the way to go. It's a natural process that transforms organic waste into nutrient-rich soil, perfect for gardening and landscaping. One of the most efficient ways to compost is using a tumbler. In this blog, we'll dive into everything you need to know to start composting in a tumbler, step-by-step, with tips to make the process smooth and successful.
Why Composting in a Tumbler?
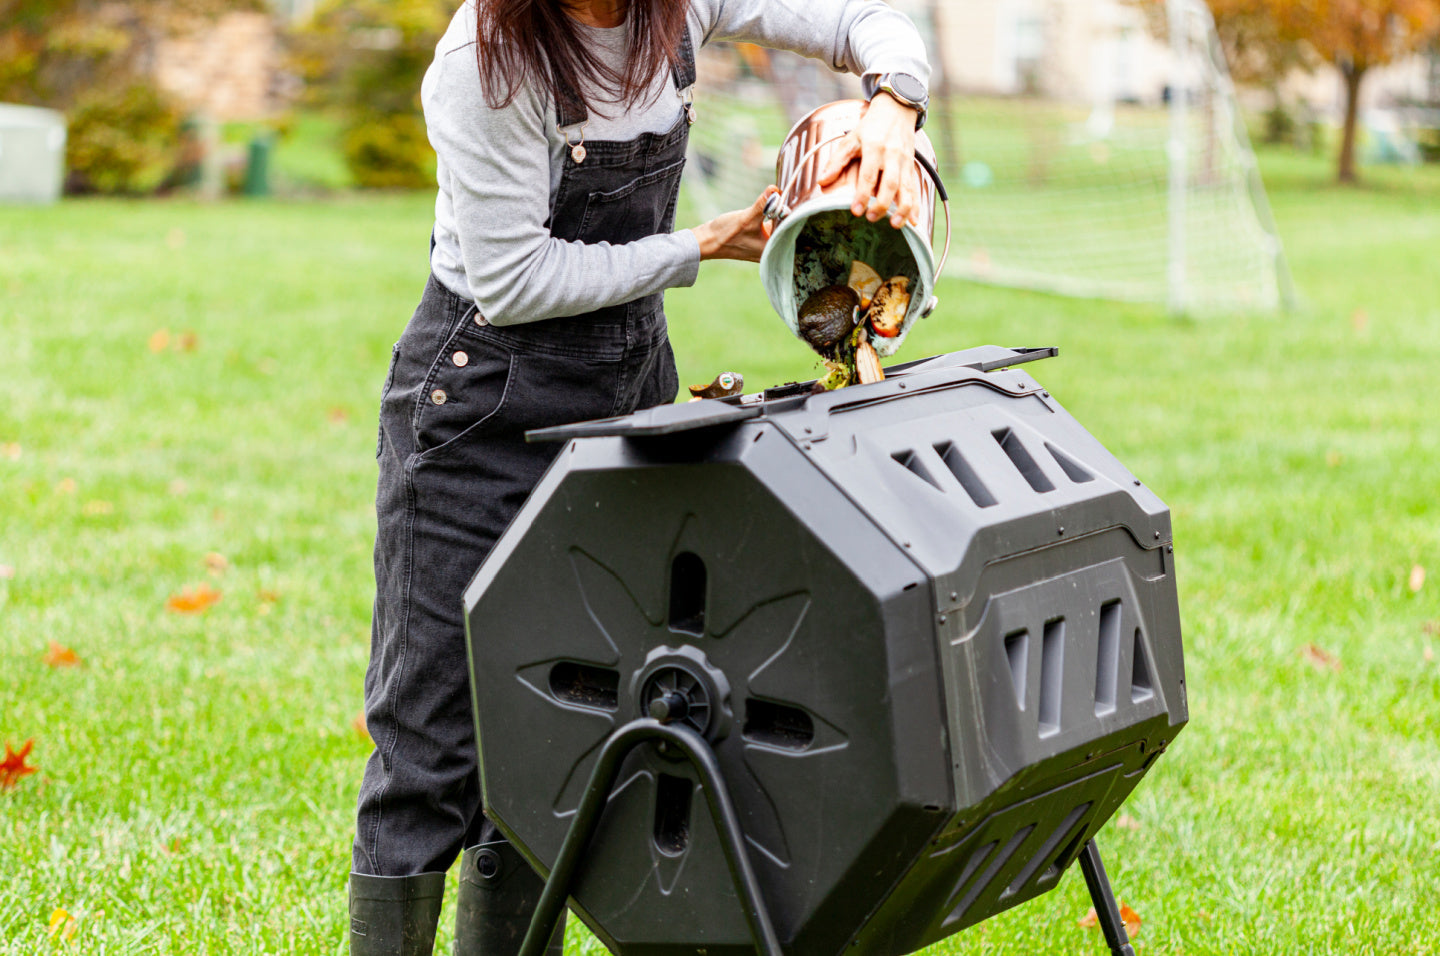
Composting in a tumbler has several advantages over traditional composting methods. Here are a few reasons why you might choose a tumbler over other methods:
- Speed: Tumblers are designed to accelerate the composting process. With regular turning, you can have finished compost in as little as a few weeks.
- Convenience: Tumblers are easy to use. Their design allows for easy turning, which helps aerate the compost and speed up decomposition.
- Pest Control: Tumblers are enclosed, keeping pests like rodents and insects out of your compost.
- Neatness: They keep your compost contained, reducing odors and keeping your yard tidy.
Getting Started
- Choosing the Right Tumbler
There are many compost tumblers on the market, and choosing the right one depends on your needs. Consider the following:
- Size: How much waste do you generate? If you have a large garden or produce a lot of kitchen waste, opt for a larger tumbler of over 40 gallons. Smaller tumblers are suitable for households with less waste.
- Design: Some tumblers have a single chamber, while others have dual chambers, allowing you to start a new batch while the first one finishes composting. Dual chambers can be beneficial if you want a continuous supply of compost.
- Material: Look for a sturdy, weather-resistant material that will last for years. Plastic tumblers are less expensive, lightweight and durable, while metal tumblers are more costly, heavier but more robust.
- Location
Place your tumbler in a convenient location with good drainage. Tumblers can and do seep from time to time. It should be accessible for adding waste and turning but not so close to your home that any potential odors are a nuisance. A sunny spot can help speed up the composting process by keeping the tumbler warm.
- What to Compost
 You can compost a wide variety of organic materials, but it's important to get the balance right. Compost needs a mix of "greens" (nitrogen-rich materials) and "browns" (carbon-rich materials).
- Greens: Fruit and vegetable scraps, coffee grounds, grass clippings, tea bags. These materials provide the nitrogen necessary for microbial growth and activity.
- Browns: Dry leaves, straw, cardboard, paper, wood chips. These materials add carbon, which provides energy for the microbes that break down the organic matter.
Avoid composting meat, dairy products, fats, oils, and pet waste, as these can attract pests and create unpleasant odors. Additionally, avoid composting diseased plants or weeds that have gone to seed to prevent spreading them in your garden. You may be tempted to add in those wilted flowers from the florist – but that is also not advisable due to the pesticides that were used to grow them.
Building Your Compost
- Layering
Start by placing a layer of browns at the bottom of the tumbler. This helps with aeration and drainage. Follow with a layer of greens. Aim for a ratio of about 3 parts browns to 1 part greens. This balance helps create an optimal environment for microorganisms to thrive.
- Moisture
Compost should be moist but not soggy. Think of a wrung-out sponge. If your compost is too dry, add water or more greens. If it's too wet, add more browns. Moisture is crucial because it helps microorganisms move through the compost and break down materials efficiently.
- Turning
Turn your tumbler regularly, ideally every few days. This helps mix the materials and introduce oxygen, which is essential for the composting process. Some tumblers have a handle or crank for easy turning. Regular turning prevents the compost from becoming anaerobic (lacking oxygen), which can cause odors. Ideally your compost bin should have no foul smells at all.
Maintaining Your Compost
- Monitoring
Keep an eye on the moisture level and temperature. The compost should feel warm; this indicates that the microorganisms are working. If it starts to smell bad, it may be too wet or contain the wrong materials. Adjust the balance of greens and browns and ensure proper aeration by turning the tumbler more frequently.
- Adding Materials
Continue to add kitchen and garden waste as you produce it. Chop larger items into smaller pieces to speed up decomposition. Remember to maintain the balance of greens and browns. Adding a mix of small and large pieces can help maintain good aeration and avoid compacting the compost.
- Patience
Composting takes time. Depending on conditions, it can take anywhere from a few weeks to several months to produce finished compost. Be patient and keep turning and monitoring your compost. The process is natural and relies on microorganisms to break down the organic matter.
Using Your Compost – When, Where and How
Once your compost is dark, crumbly, no longer warm to the touch and earthy-smelling, it means that the organic matter has finished breaking down completely and is ready to use. Here are a few ways to utilize your finished compost:
- Garden Beds: Mix compost into your garden soil to improve fertility and structure. Compost adds essential nutrients and organic matter, improving soil health and plant growth.
- Potted Plants: Use compost as a nutrient-rich additive for potting soil. Mix it with your regular potting soil to provide extra nutrients for your plants.
- Top Dressing: Spread compost around trees, shrubs, and other plants as a natural fertilizer. This helps improve soil structure and nutrient content without disturbing plant roots.
- Lawn: Sprinkle compost over your lawn to promote healthy growth. Compost can help improve soil structure, retain moisture, and provide nutrients to grass.
Troubleshooting Common Issues
It is common (especially when getting started) to run into some issues. Knowing what it means and what to do will help you get through them quickly and confidently.
- Odors
If your compost smells bad, it may be too wet or contain inappropriate materials (like animal by-products for example). Add more browns to absorb moisture and balance the mix. Ensure you are turning the tumbler regularly to provide adequate aeration. Be patient and watchful. You should see the odors dimmish in a few days.
- Slow Decomposition
If your compost isn't breaking down, it may be too dry or not getting enough air. Add water if it's dry and turn it more frequently. Ensure you have the right balance of greens and browns to support microbial activity. Check the temperature to monitor if it is rising. You would ideally want to see it go above 130 degrees. You should begin to feel the heat rising out of the tumbler by placing your hand above the compost.
- Pests
While tumblers are good at keeping pests out, occasional issues can arise. Ensure the lid is secure and avoid adding meat or dairy products. If pests become a problem, check for gaps or openings and repair them if necessary. Seeing flies is normal when the decomposition process is active.
- Temperature
If the compost is not heating up, it may be due to insufficient greens or a lack of moisture. Add more nitrogen-rich materials and water if needed. Composting slows down in colder weather, so be patient during winter months. If you are able, move the composter to a sunny location to help speed decomposition.
Additional Tips for Successful Composting
- Keep It Simple
Don't overcomplicate the process. Stick to the basics of balancing greens and browns, maintaining moisture, and regular turning. Simple practices lead to consistent results.
- Use a Compost Thermometer
A compost thermometer can help you monitor the temperature of your compost. Ideal temperatures are between 130°F and 160°F, which indicate active decomposition. If temperatures drop, it may be time to turn the tumbler or add more materials.
- Seasonal Adjustments
Adjust your composting practices based on the season. In warmer months, composting will be faster, while in colder months, the process will slow down. During winter, you can insulate the tumbler or move it to a sunnier spot to help maintain activity.
- Educate Yourself
Read a variety of sources about composting techniques and best practices. There are many resources available online, such as gardening websites, forums, and local workshops.
To Sum it All Up
Starting a composting journey with a tumbler is a rewarding way to reduce waste, improve your garden, and contribute to a healthier environment. If you follow the steps outlined in this guide, you can create rich, fertile compost that will benefit your plants and soil. Remember to be patient, monitor your compost, and enjoy the learning process of turning kitchen scraps and garden waste into valuable soil amendments. Over time you will become a natural at composting!
By following these steps and tips, you can turn your kitchen and garden waste into valuable compost, enriching your soil and reducing your environmental footprint. Happy composting!

Jana Taylor is an Iowa native and seasoned copy writer, content creator and designer, specializing in marketing and graphic design since 2015. In her spare time, she volunteers in her community, loves to garden and is an avid travel enthusiast.
For more detailed information and tips on composting, check out these resources:
- U.S. Environmental Protection Agency (EPA) - https://www.epa.gov/recycle/composting-home
- Good Housekeeping - https://www.goodhousekeeping.com/home/gardening/advice/a23945/start-composting/
- The Spruce - https://www.thespruce.com/composting-for-beginners-8660454
- Rodale Institute - https://rodaleinstitute.org/why-organic/organic-farming-practices/composting/
- University of California Agriculture and Natural Resources - http://vric.ucdavis.edu/pdf/compost_rapidcompost.pdf


